How to ride steep features
Piyush Chavan of Treadmark Coaching shows us how to find stability and control in steeper terrain
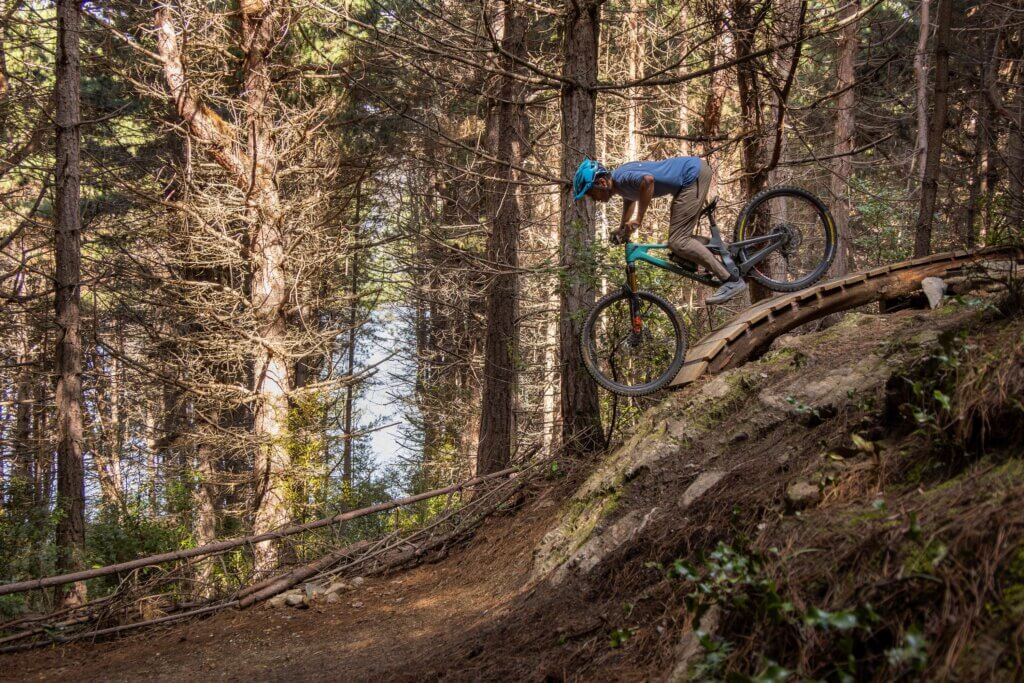
Words Piyush Chavan | Images Callum Hayes
This article talks about the movement needed when riding steeper features. For this instructional, we made use of a rock roll to help you train these movements for better control and stability when approaching steeps.
The goal is to develop dynamism in your movements on the bike while using correct judgement and tools to adapt to changing terrain and traction. When you’ve mastered these skills, you’ll feel stable and centred in your full range of movement and able to adapt to changing gradients with precision and control.
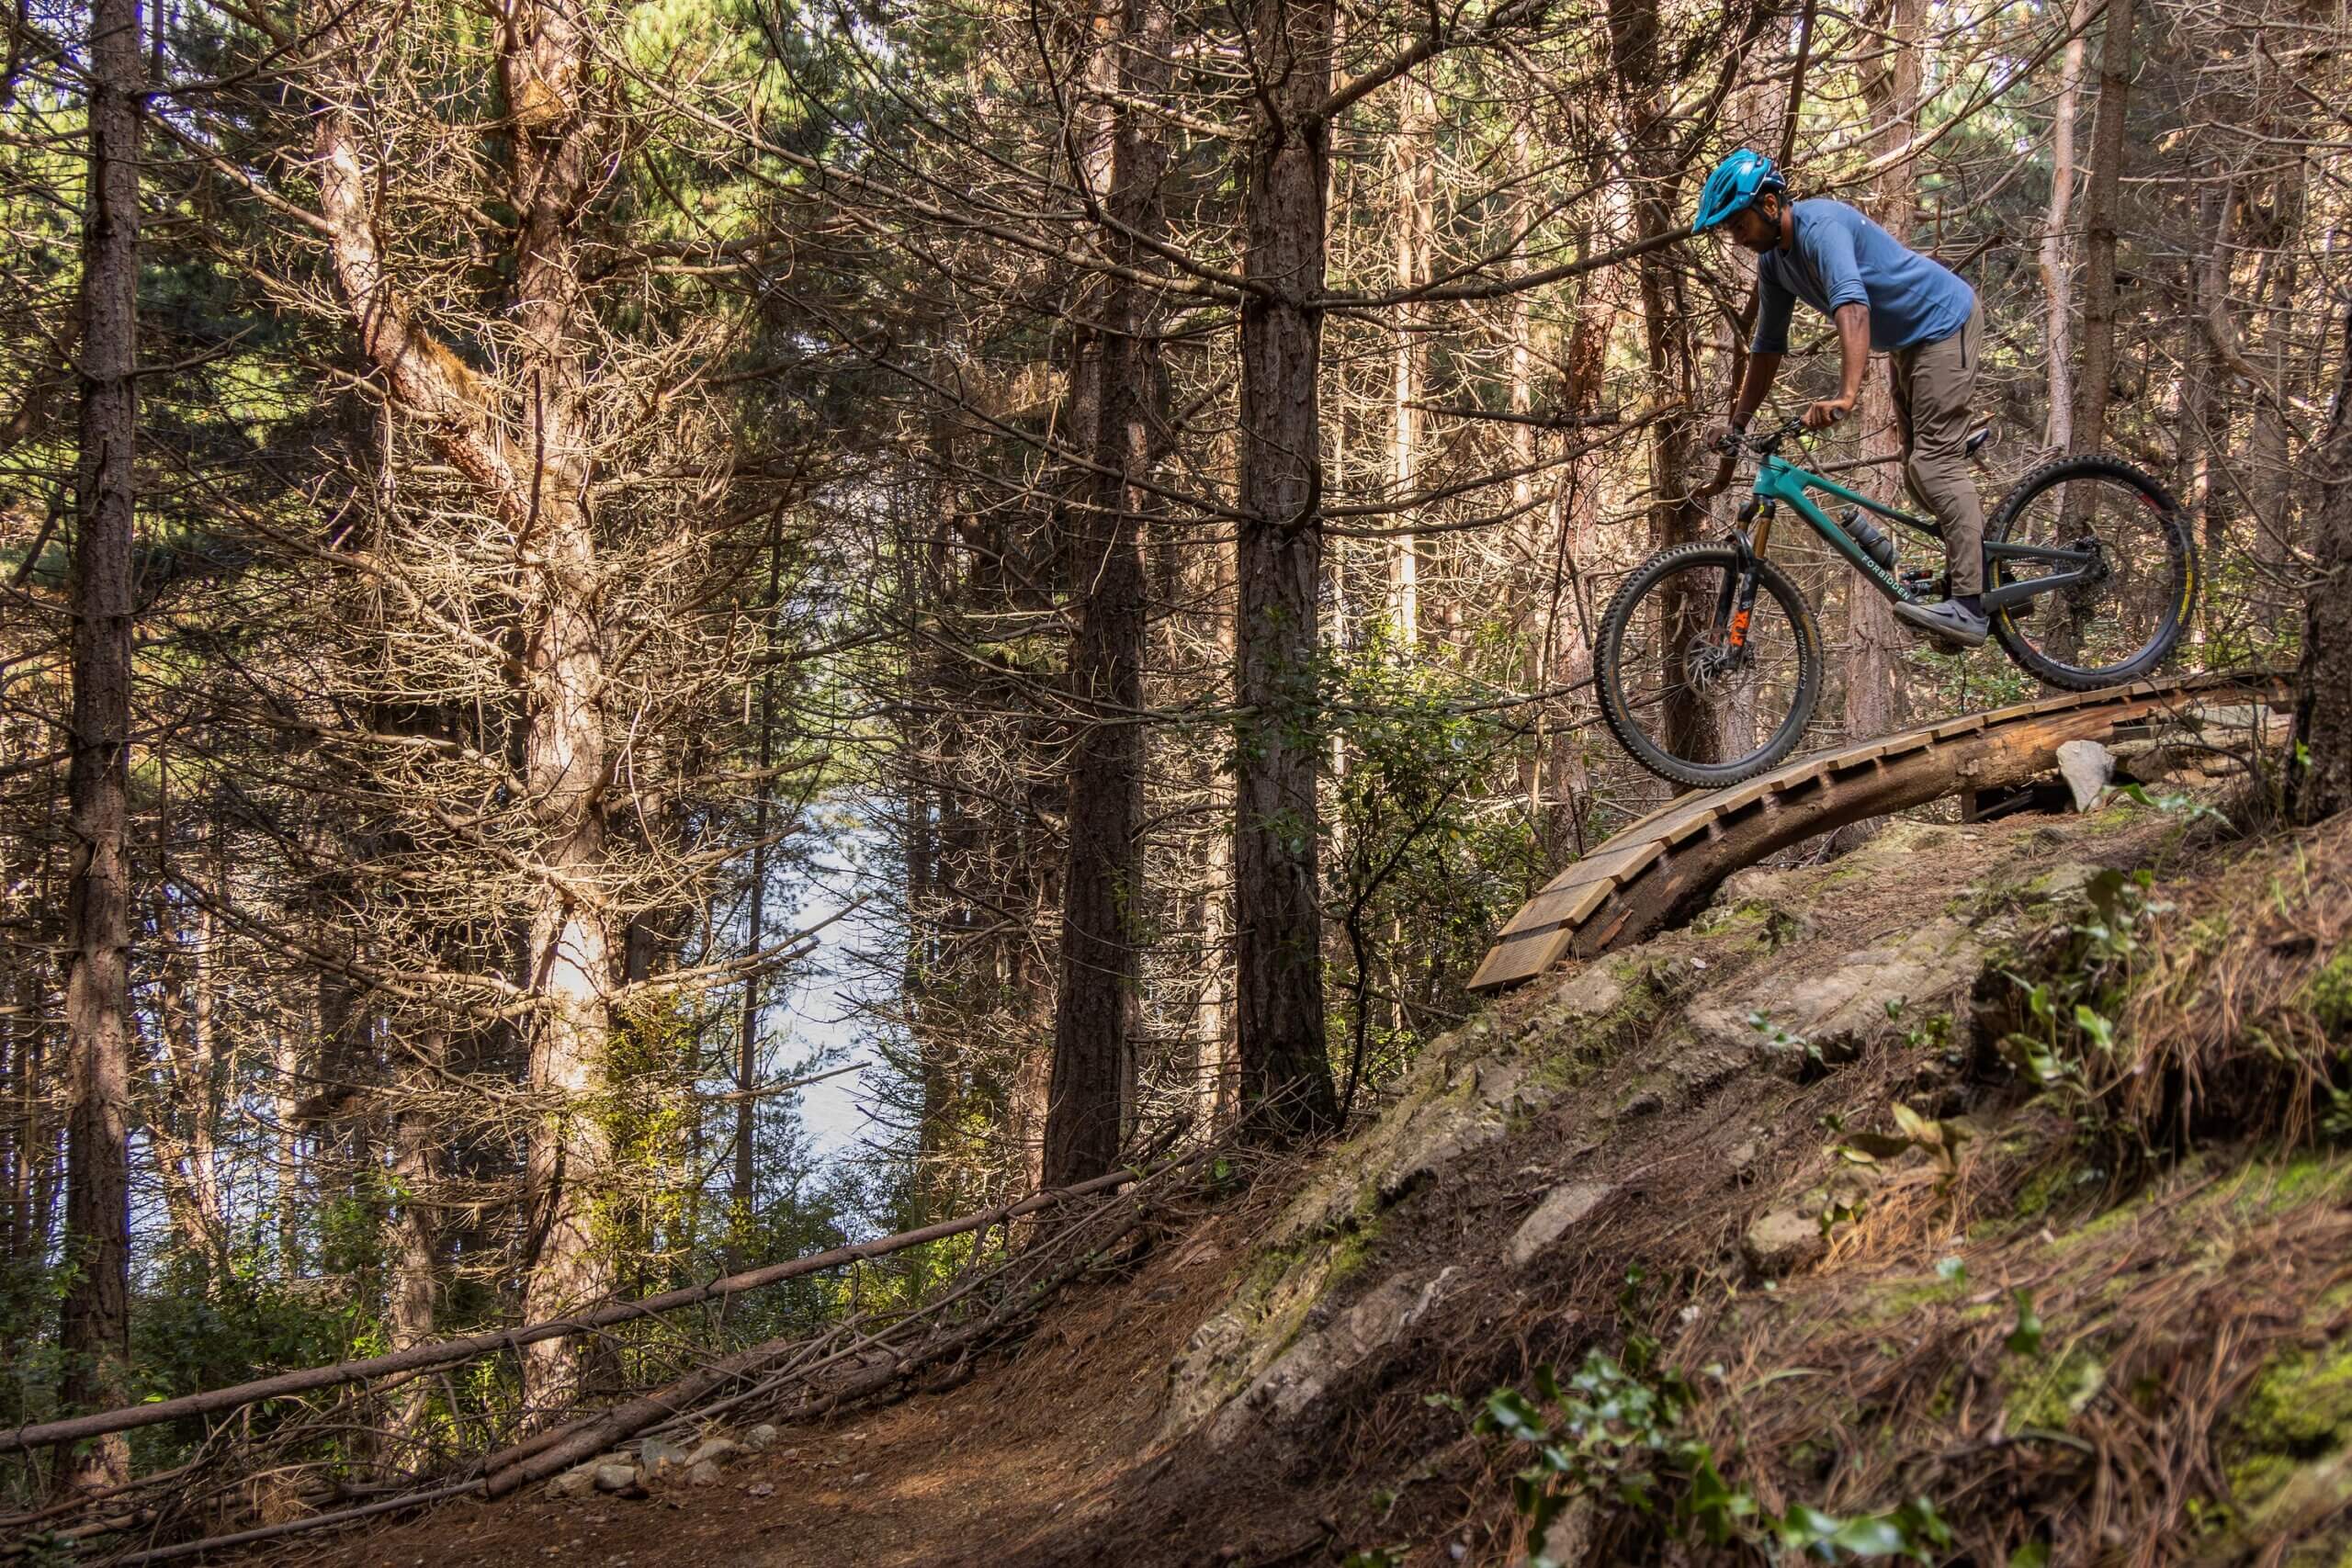
To best make use of the article, find a similar feature that you’re comfortable riding, ideally with a flat approach that then becomes steeper before flattening out on the exit. The feature we’ll use starts off relatively flat and then curves into a steeper gradient and then again flattens out on the exit.
Position
Think of this as a gear stick in a manual car—we move it from a neutral position to change gears. Similarly, body position on the bike isn’t fixed and moves up and down depending on changes in terrain. For this feature, we’re going to move from a tall, powerful position to a low, manoeuvrable position and then back to the tall position.
Approaching the feature
Keep your braking consistent throughout the feature to maintain a speed you’re comfortable with. The positions now come in so we can adapt to the change in gradient, staying centred and in control. First is the tall, strong position we’ll call “Default”.
Default position
- Tall and strong.
- Legs are relatively straight with all your weight through the feet.
- A slight forward bow at the hips so your chin stays over the stem.
- Little to no pressure through the arms.
On the feature
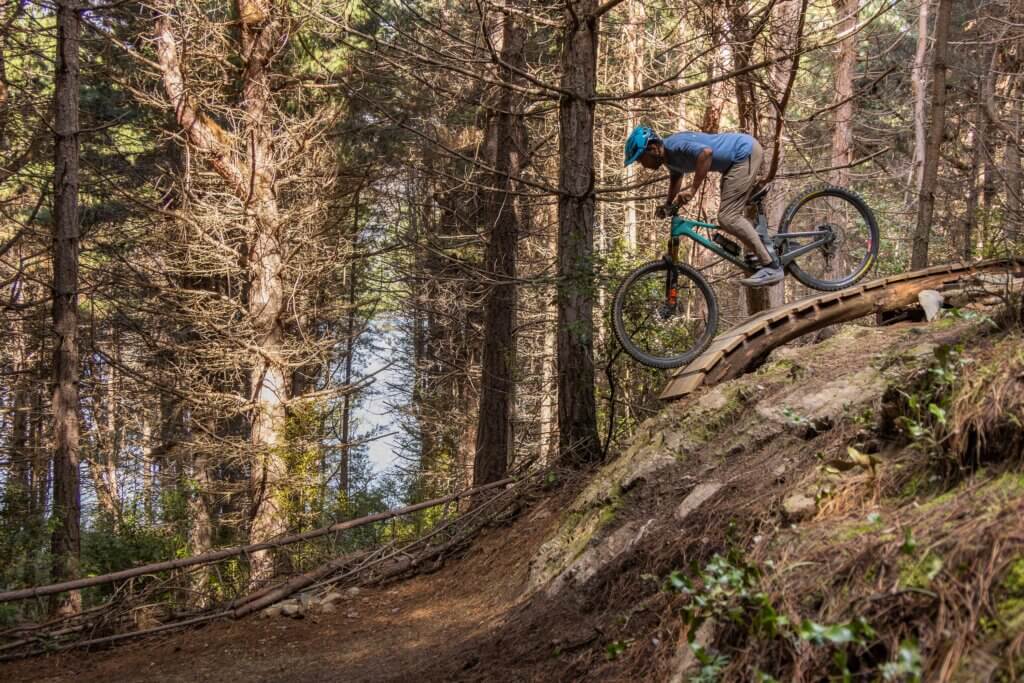
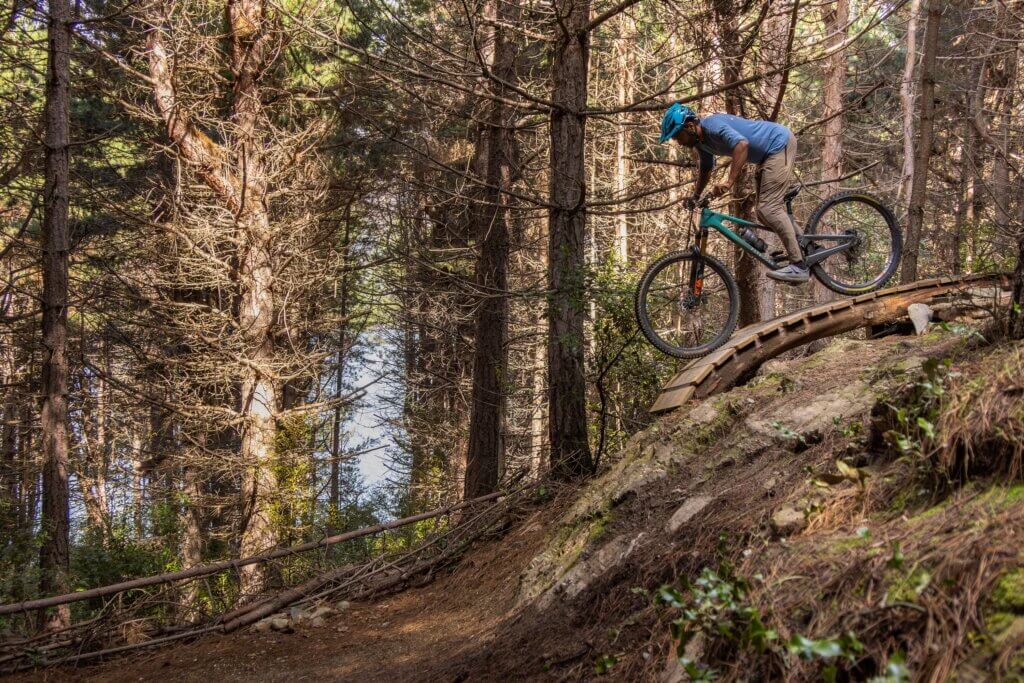
As soon as the gradient is about to get steeper, absorb the change by moving into the lower, more manoeuvrable position.
How you move closer to the bike makes all the difference. An active hinge in the hips is required. Imagine a sponge ball is placed on your hip flexor and your uppermost part of your thigh and lower most part of your torso are squeezing the ball.
You can also do this by placing your fist on the hip flexor when off the bike. As you move lower your thigh and torso should squeeze equally into the fist. Training this movement off the bike makes a mountain of difference.
Stay low until the gradient flattens out again to maintain manoeuvrability.
The key indicator: As you move lower and closer to the bike, you should feel that your weight stays on your feet throughout. This essentially translates to moving lower while maintaining centredness on the bike.*
*I understand this may be challenging to learn so feel free to pop in a message. We have incredible tools like the SportSense app that have made remote feedback that much more accessible.
Low position
- Low and close to the bike.
- Active hinge in hips.
- Weight stays on feet.
- Stay low until gradient is about to flatten out.

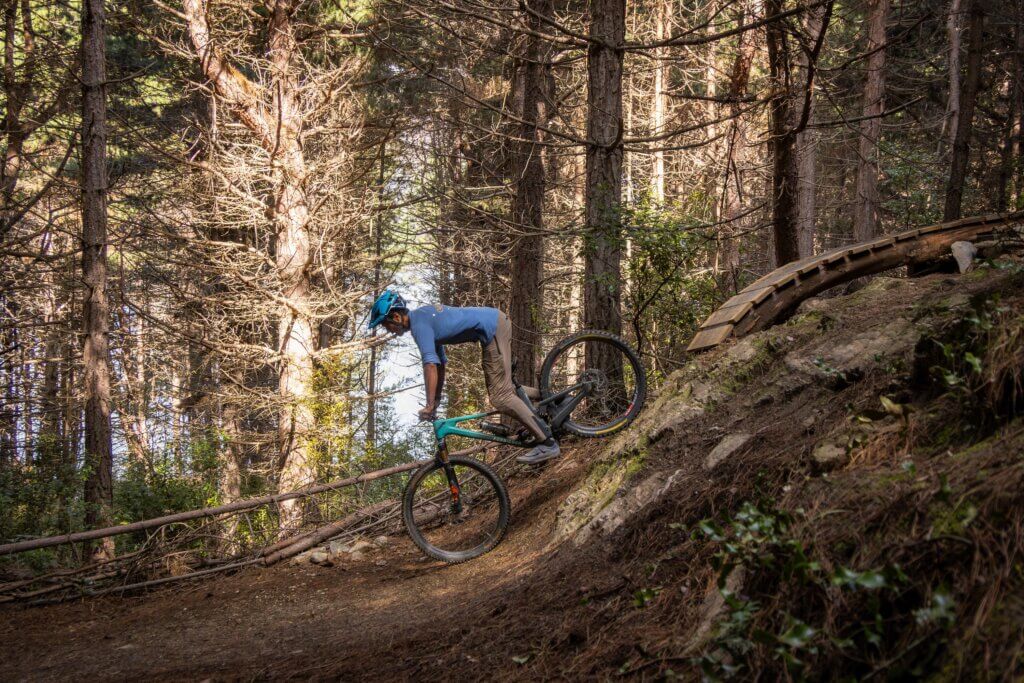
The exit
The change from steep to flat on the exit is effectively a compression so you’ll need to push through with your arms and legs, returning to the default position.
As the feature flattens out , extend your arms first, then legs using your hip hinge to return back to the taller, stronger Default position.
Here’s a task to help you learn the timing and co-ordination for this technique:
Place or draw a marker at the end of the steep section where the trail flattens out.
Stay low and centred through the steep section and crush the marker with your front wheel by pressing through your arms deliberately as you return to your tall, strong default position.
Why? It forces you to stay low for longer, reinforcing proper timing and stability. This way your drive to the taller and stronger position is perfectly timed.
Return to Default position
- Push through your arms and legs as gradient flattens.
- Extend arms first, then legs using hip hinge.
- Push into compression.

Inconsistencies to watch out for
There can be a tendency to extend arms too early, before the steep section is completed. This will cause you to get sucked down as soon as you ride the part where the gradient flattens out. It should feel like driving and pressing your arms through the compression.
Hope you guys enjoyed the read and found some useful tools to progress on your riding on the steeps. As a bonus I’d like to offer every reader of this article a complimentary video analysis via our SportSense app.
Go out and attempt your favorite feature and send us a video using the following steps
- Open/Download Whatsapp
- Open chat to +64210614017
- Click + Share document and select video. (This retains quality for analysis)
Cheers team. See you out on the trails.
About
Piyush Chavan is the owner and operator of Treadmark – Insightful Mountain Bike Coaching in Queenstown, New Zealand.
- Website: treadmark.co.nz
- Instagram: treadmarknz
- Email: management@treadmark.co.nz
- Phone: 0210614017